Table of Contents
Hey there, fellow gardeners! Are you looking to add a nutritious and versatile green to your backyard garden? Look no further than kale! This leafy vegetable has been growing in popularity lately thanks to its incredible nutritional content and delicious taste. And the best part? Growing kale in your home garden is super easy and rewarding.
In this article, we’ll walk you through the basics of how to grow kale in your backyard. We’ll cover everything from soil preparation to pest control, so you’ll be ready to cultivate a bountiful crop of healthy greens.
Whether you’re an experienced gardener or a beginner, you’ll find valuable tips and tricks in this guide. Plus, growing your own kale is a great way to save money on store-bought produce and reduce your carbon footprint.
So, let’s roll up our sleeves and get started on growing some tasty, nutrient-packed kale in our own backyards!
Preparing Your Soil for Planting
Preparing Your Soil for Planting
Before planting kale in your home garden, it is crucial to prepare your soil correctly. Here are the essential aspects to consider:
Test Your Soil
The first step in preparing your soil is to test its pH level. You can buy a soil testing kit from your local gardening store or nursery. Kale grows best in soil with a pH range of 6.0 to 7.5. If your soil pH is outside this range, you may need to adjust it.
Choose the Right Site
Kale loves sunlight, so choose a site that receives a minimum of 6 hours of sunlight per day. The location should also be away from trees and other plants that may shade your kale plants.
Clear the Site
Clear the site of all weeds, grass, and rocks. Remove any debris in the soil and rocks larger than a quarter of an inch. This step helps to ensure that the kale seedlings get all the essential nutrients, water, and sunlight to grow.
Add Organic Matter
To improve the soil quality, add organic matter like compost, leaves, or grass clippings to the soil. This step boosts the soil’s fertility, drainage, and moisture-holding capabilities. Mix the organic matter with the soil, so it spreads evenly.
Use Fertilizer
Fertilizer provides essential nutrients necessary for the growth of your kale. Use a high-nitrogen fertilizer to boost leafy growth, following the instructions on the bag. Get the best fertilizer that helps you close the gap on soil nutrients that need to be added for kale growth.
Preparing the soil in your garden is necessary for a successful kale harvest. This step helps provide your kale with the ideal growing environment. Test your soil, choose the right site, clear the site, and add organic matter for the best results. By taking these essential steps, you’ll be greener and well on your way to a bountiful kale harvest in your home garden!
Selecting the Right Kale Seeds
Selecting the Right Kale Seeds
Selecting the right kale seeds is crucial to ensure a successful and bountiful harvest. Here’s what you need to consider when selecting your kale seeds:
Opt for Organic Seeds
When choosing kale seeds, it is essential to purchase organic seeds. These seeds are free from harmful chemicals and pesticides, which can harm the environment and the plant itself. Organic kale seeds are also non-GMO, meaning they have not been genetically modified.
Choose Kale Variety
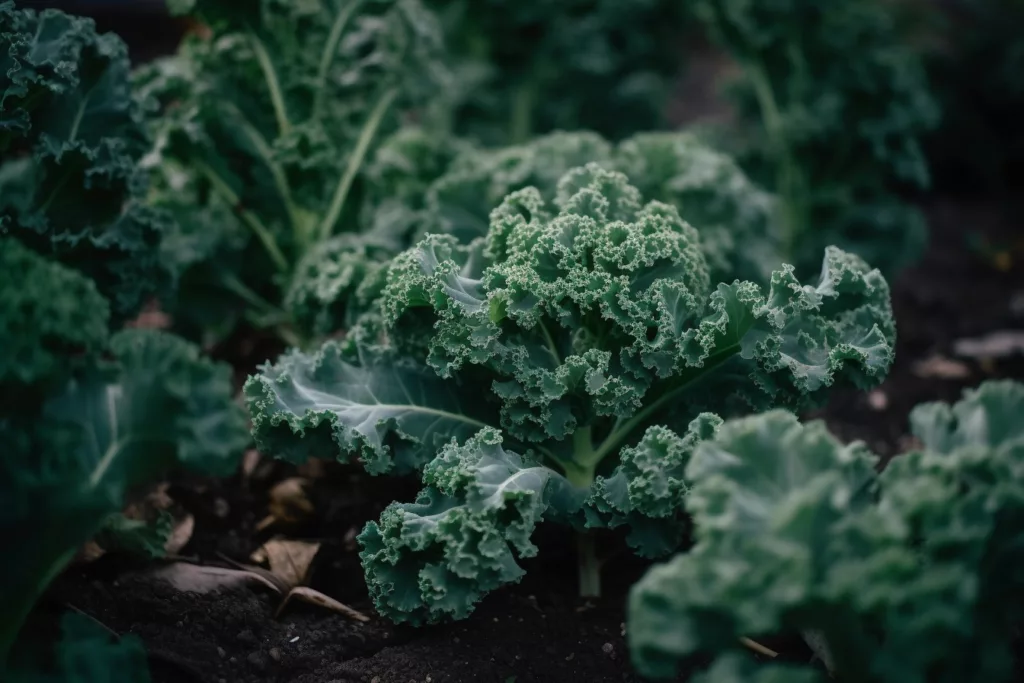
Kale comes in many varieties, and selecting the right variety is essential. The most common kale varieties are curly kale and Lacinato kale or dinosaur kale. Curly kale has ruffled leaves and a crisp texture, while Lacinato kale has longer, narrow leaves. Depending on your gardening goals, select the kale variety that suits you best.
Look for Disease-Resistant Seeds
Kale is susceptible to diseases such as clubroot and downy mildew. When selecting your kale seeds, choose a disease-resistant variety. This type of kale seed has been bred to prevent common diseases, ensuring that your kale plants remain healthy.
Consider a Reputable Seed Company
To ensure the quality of your kale seeds, it’s best to purchase seeds from a reputable seed company. This approach helps to confirm the seed’s origin and that it is of high quality. You also get to see feedback from previous clients who purchased seeds from the company.
Check Planting and Harvesting Time
Different kale varieties have different planting and harvesting time, which affects the maturity and timing of harvesting. Be sure to check the seed package for planting and harvesting time to plan accordingly.
Choosing the right kale seeds is essential for growing healthy and robust plants. Select organic seeds, choose the right kale variety, look for disease-resistant seeds, consider a reputable seed company, and check planting and harvesting time to ensure optimal results. With these steps, you’ll be enjoying fresh, homegrown kale from your backyard garden in no time!
Planting and Watering Your Kale
Planting and Watering Your Kale
After you have selected the right kale seeds and prepared your soil, it’s time to plant your kale and make sure it gets enough water. Here’s what you need to know:
When to Plant Your Kale
Kale is a cool-season crop, meaning it grows best in cooler weather. You can plant it in early spring, just after the last frost, or in mid-summer for a fall harvest. Be sure to check the seed package for specific planting instructions for your kale variety.
How to Plant Your Kale
To plant your kale, dig small holes and place the seeds in them. Cover the seeds with soil, and water gently. Alternatively, you can sprinkle the seeds directly onto the soil and cover them with a layer of soil. Be sure to space your kale seeds apart, ensuring at least 12 inches of space between them.
Watering Your Kale
Kale needs consistent moisture to grow healthy and robust. Water your kale plants regularly, ensuring the soil stays consistently moist. Aim to give your plants one inch of water per week, and more during hot and dry weather. Be careful not to overwater your plants, as this can lead to root rot.
Mulching
Mulching helps to retain moisture in the soil, keep the soil temperature consistent, suppress weeds, and improve the soil structure. Applying a layer of organic mulch, like straw or grass clippings, around your kale plants will help them grow and thrive.
Consider Drip Irrigation
Drip irrigation is a great way to ensure that your kale plants get a consistent supply of water. Drip irrigation slowly waters the soil at the roots of your plants, eliminating the need for overhead watering.
Planting and watering your kale are essential for a bountiful harvest. Be sure to plant your kale at the right time, space your seeds appropriately, and water your plants regularly using drip irrigation or a watering can. Don’t forget to apply organic mulch around your plants to help conserve moisture. By taking these steps, you’ll be on your way to enjoying fresh kale from your home garden all year round!
Caring for Your Kale Plants
Caring for Your Kale Plants
Once you’ve planted your kale and ensured it has sufficient water, it’s essential to care for your kale plants to help them grow healthy and strong. Here’s what you need to know:
Fertilizing Your Kale
Fertilizing your kale is an essential aspect of caring for your kale plants. Use a balanced fertilizer with equal amounts of nitrogen, phosphorus, and potassium. Consider using a slow-release fertilizer every four to six weeks. Avoid fertilizers that contain too much nitrogen, as this can lead to unhealthy plant growth.
Thinning Your Kale Plants
After planting your kale, it’s essential to thin out your newly sprouted seedlings. The ideal spacing for kale is 12 inches apart. Do this to ensure your plants have enough space to grow, receive adequate nutrition, and sunlight.
Pest Control
Kale can be vulnerable to pests like aphids, flea beetles, and slugs. To control pest issues, ensure you apply a pesticide or insecticide to eliminate the pests harming your kale. Alternatively, companion planting can help repel pests. Kale grows well alongside plants such as marigold, thyme, and sage.
Harvesting Your Kale
Kale can take anywhere from 55-75 days to mature, depending on the variety. To harvest, pick the outer leaves first as the plant grows. When you see your kale leaves are large enough to eat, cut them with a sharp knife or scissors at the base of the stem. Avoid pulling the entire plant off the ground.
Replanting
Kale is a cool-season crop that can continue to grow and produce leaves for 2-3 years, but it’s best to replant your kale every season. This step helps reduce the likelihood of diseases and pests.
Caring for your kale plants is essential for healthy growth and bountiful harvest. Fertilize your kale plants regularly, thin out your seedlings, protect your plants from harmful pests, harvest them properly, and don’t forget to replant every season. By taking these steps, you’ll be well on your way to enjoying fresh and delicious kale from your backyard garden!
Harvesting Your Kale Bounty
Harvesting Your Kale Bounty
Harvesting your kale bounty is an exciting and rewarding part of growing kale in your home garden. Here’s what you need to know:
Harvesting Time
Kale typically takes between 55-75 days to mature, depending on the variety. When your kale plants have grown to a reasonable height, you can begin harvesting. You can pick the outer leaves first, or you can wait until your kale is at full size, usually around 8-10 inches long and 20-30 inches wide.
Harvesting Technique
To harvest your kale, use a sharp knife or scissors, cutting the leaves at the base of the stem. Be careful not to pull the entire plant out of the ground, as this can damage the roots and inhibit further growth.
Harvesting Frequency
Kale is best harvested in small batches rather than all at once. Regular harvesting results in multiple crops, as kale grows back after harvesting. Taking this approach results in more kale in the long run.
Overwintering
Kale is a cool-season crop that can survive cold temperatures and even frosts. Overwintering kale is possible, and it means you can harvest your kale throughout the winter season. Harvest kale before the first frost, and cover the plants with a frost blanket to help ensure survival and continuous growth.
Long-Term Sustainability
To ensure the long-term sustainability of your kale bounty, it’s best to replant kale every season and rotate your crops. This approach helps to prevent soil depletion and reduces the risk of pests and diseases.
In conclusion, harvesting kale is a fun and rewarding experience. Harvest kale when the outer leaves are mature, make small batches of harvest, overwinter your kale, and be sure to rotate your crops and replant every season. With these steps, you’ll be enjoying fresh kale from your home garden for years to come!
Conclusion
Growing kale in your home garden is a satisfying and rewarding experience that comes with many benefits. Not only is kale packed with nutrients, but growing it in your backyard is also an environmentally-friendly way to save money on groceries and reduce your carbon footprint.
By following the essential steps outlined in this guide, you’ll be well on your way to successfully growing and harvesting your own kale. From preparing your soil to selecting the right kale seeds, planting and watering your kale, caring for your plants, and harvesting your bounty, each step is crucial in ensuring the healthy growth of your kale.
Whether you’re a novice gardener or an experienced one, growing kale in your home garden is an excellent addition to any backyard. So why not give it a try? By following these steps, you’ll be proud to see your kale abundance grow and thrive in your backyard!

